GJ Drivelines in Victoria, guide the Australian Mining Review through the process of building a new driveshaft to replace a broken unit from a Volvo off-road loader.
Driveshafts fail – that is a fact of life in the mining world. Continuous use, heavy loads, harsh conditions and the inevitable ingress of dirt all work to shorten the life of tailshafts, driveshafts and PTO shafts across the industry.
In some cases, it is a lack of maintenance that causes the failure. The driveshaft featured in this article suffered from a universal joint failure, resulting from dry needle bearings that ultimately disintegrated and allowed the trunnion to tear out of its cap.
This then caused the universal joint to break the flange – from there the path of destruction continued on down the line, twisting the shaft itself and damaging the splines on the slip yolk. The end result was a shaft too badly damaged to repair, so GJ Drivelines set about building a replacement item from scratch.
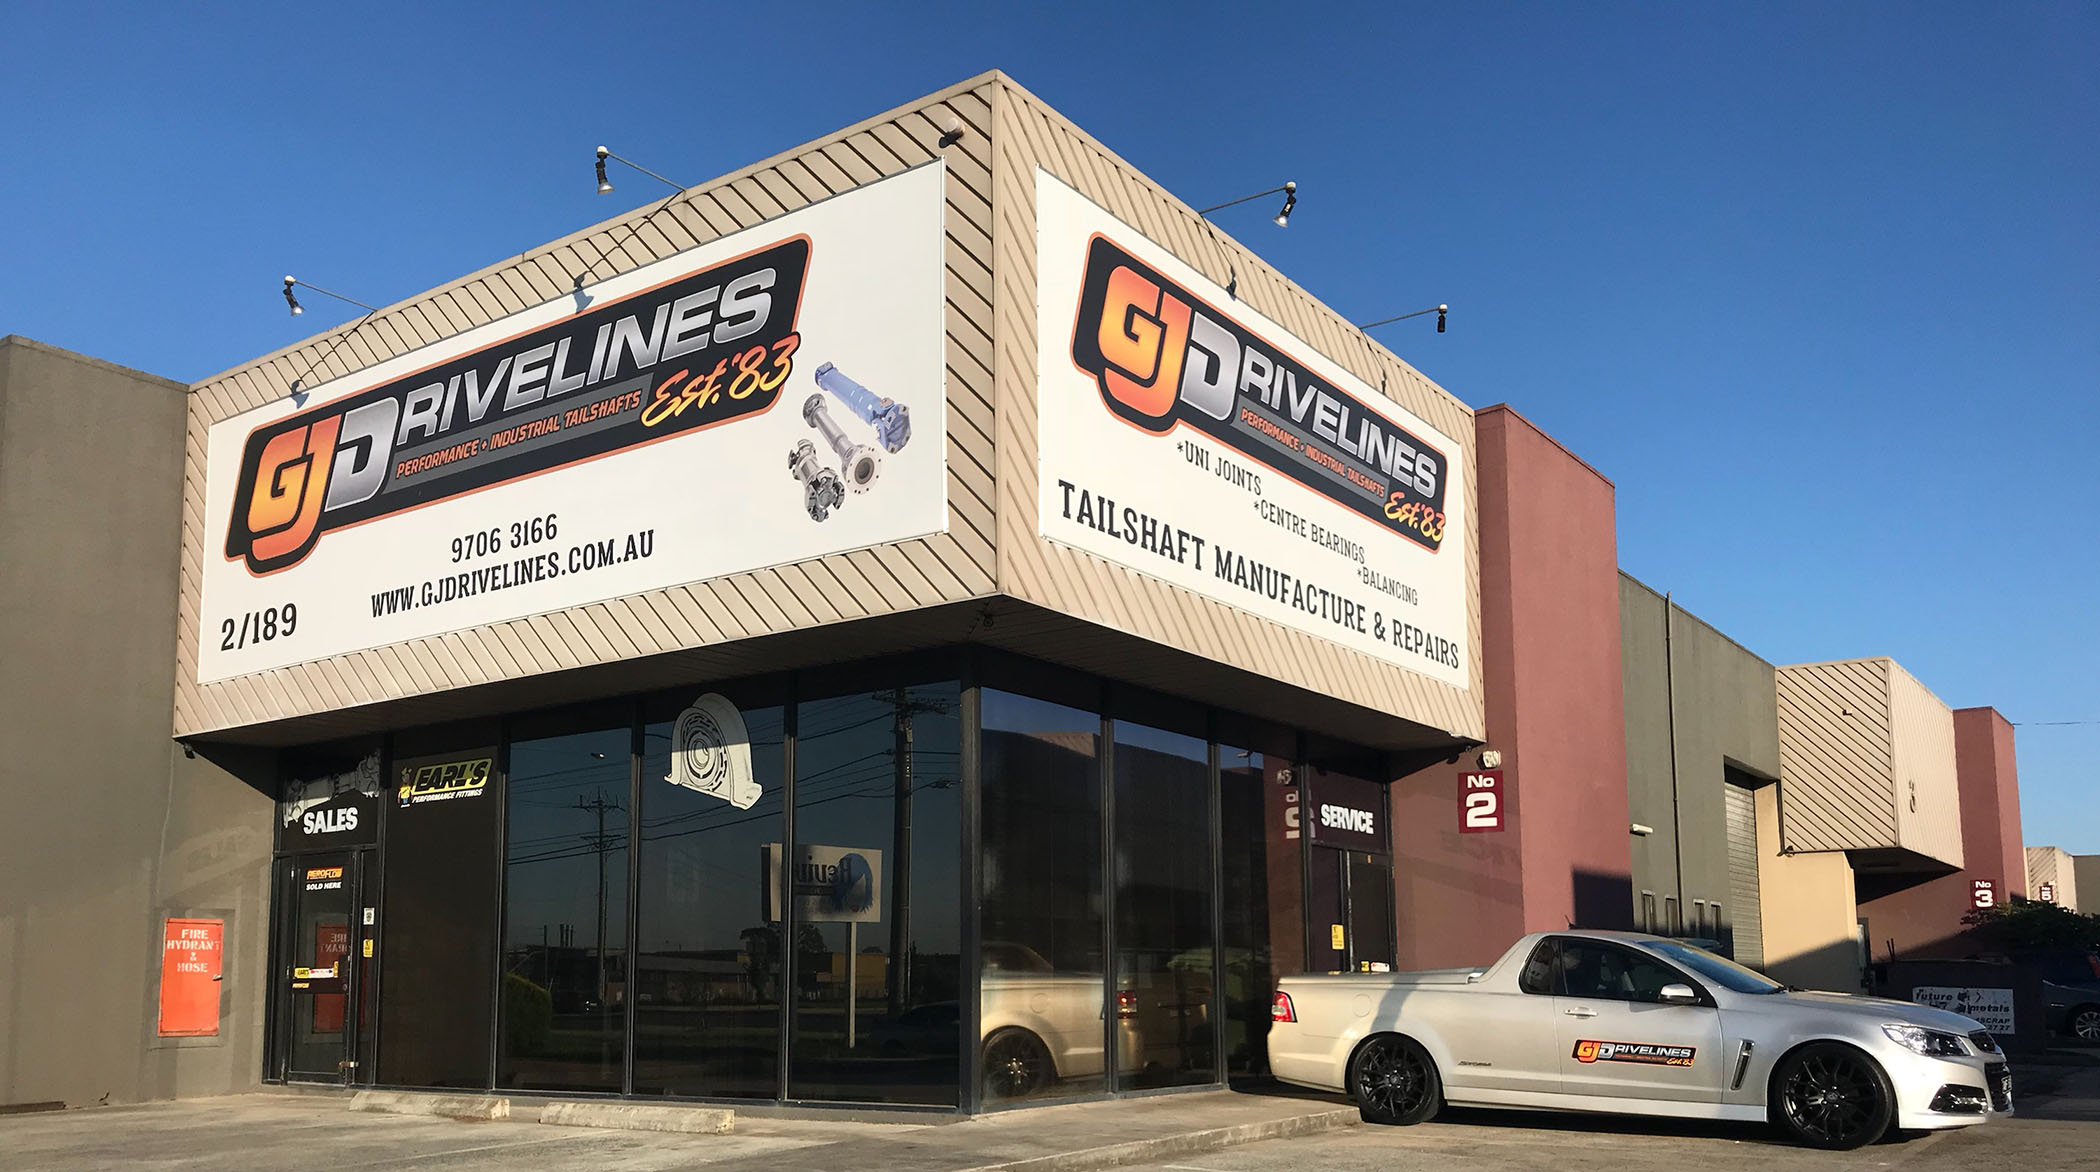
The company has two branches in Victoria, one in Keysborough and the other in Somerton.
With many decades of experience, the team has the knowledge to look at any given driveshaft, assess how it failed and determine an engineered solution that will increase both its service life and strength on the job. This both reduces the likelihood of another failure and gives their customers the confidence that their equipment will be in service for longer – mitigating the risks of very costly downtime.
The following images and captions document the process of building a brand new, high-quality driveshaft for the Volvo loader. The new shaft features a larger diameter and thicker walled tube, non-serviceable, sealed universal joints and a larger slip joint shaft with a higher spline count. All the right ingredients to make the shaft live longer in its high-load environment. Using high-quality parts that were in stock, the team at GJ Drivelines built this shaft and had it sent to the customer in one day. That is the beauty of an experienced operation with the right components, the right knowledge and the ability to simply get the job done.
1. This driveshaft from a Volvo off-road loader was destroyed after the universal joint failed, which, in turn, led to the flange being damaged, the tube being bent and the splines on the slip yolk also being damaged. It was clear that the universal joint had failed due to lack of maintenance.
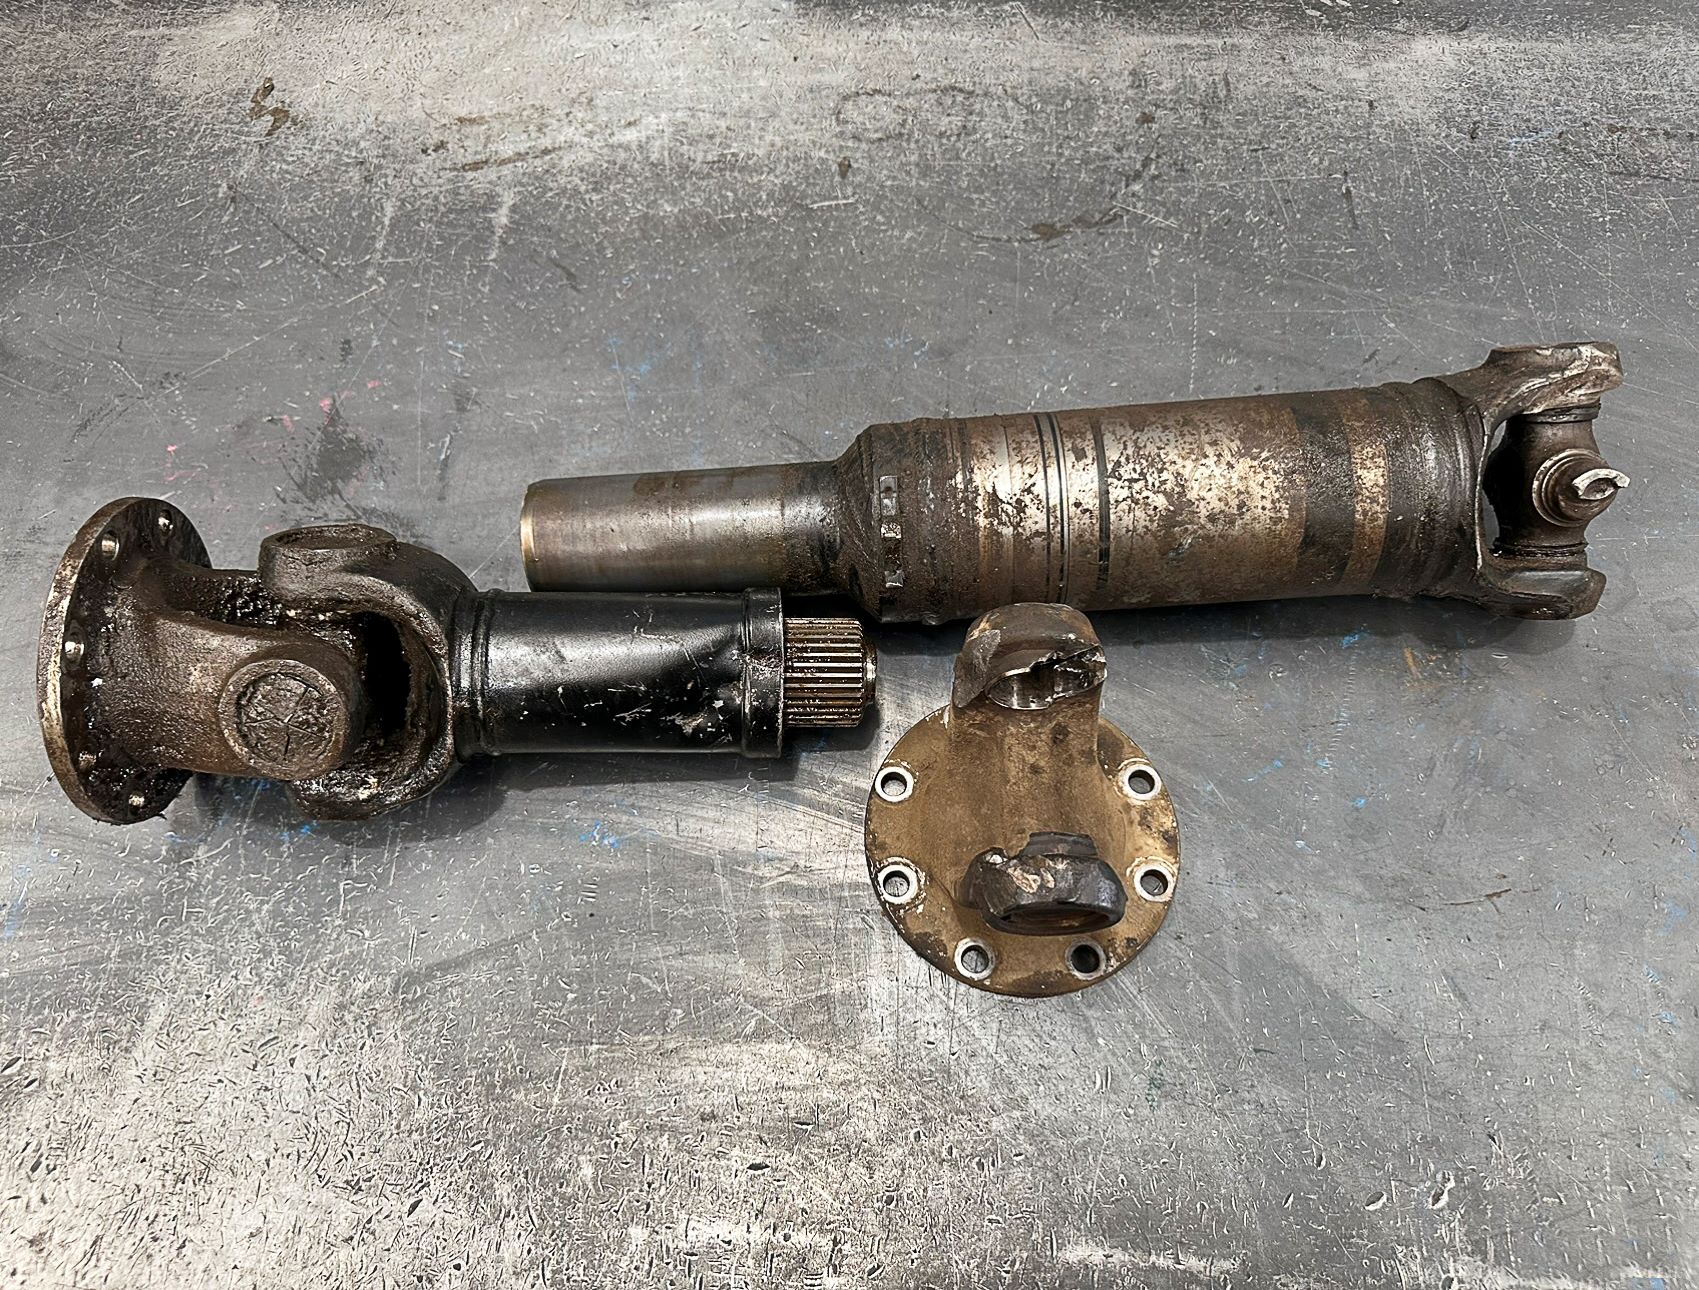
The needle bearings in the joint had been allowed to run dry and without grease they had disintegrated, allowing the trunnion to break free from its cap. The shaft was too badly damaged to repair, so the team at GJ Drivelines set about building a brand new one. The first step was to measure the universal joint and select a new heavy-duty, sealed unit from the same series. Sealed units typically resist water and dirt ingress and retain their lubricating grease for longer. This increases the intervals required between inspection and servicing. The next steps involve measuring the flange patterns and dimensions and then measuring total, closed and working length of the shaft.
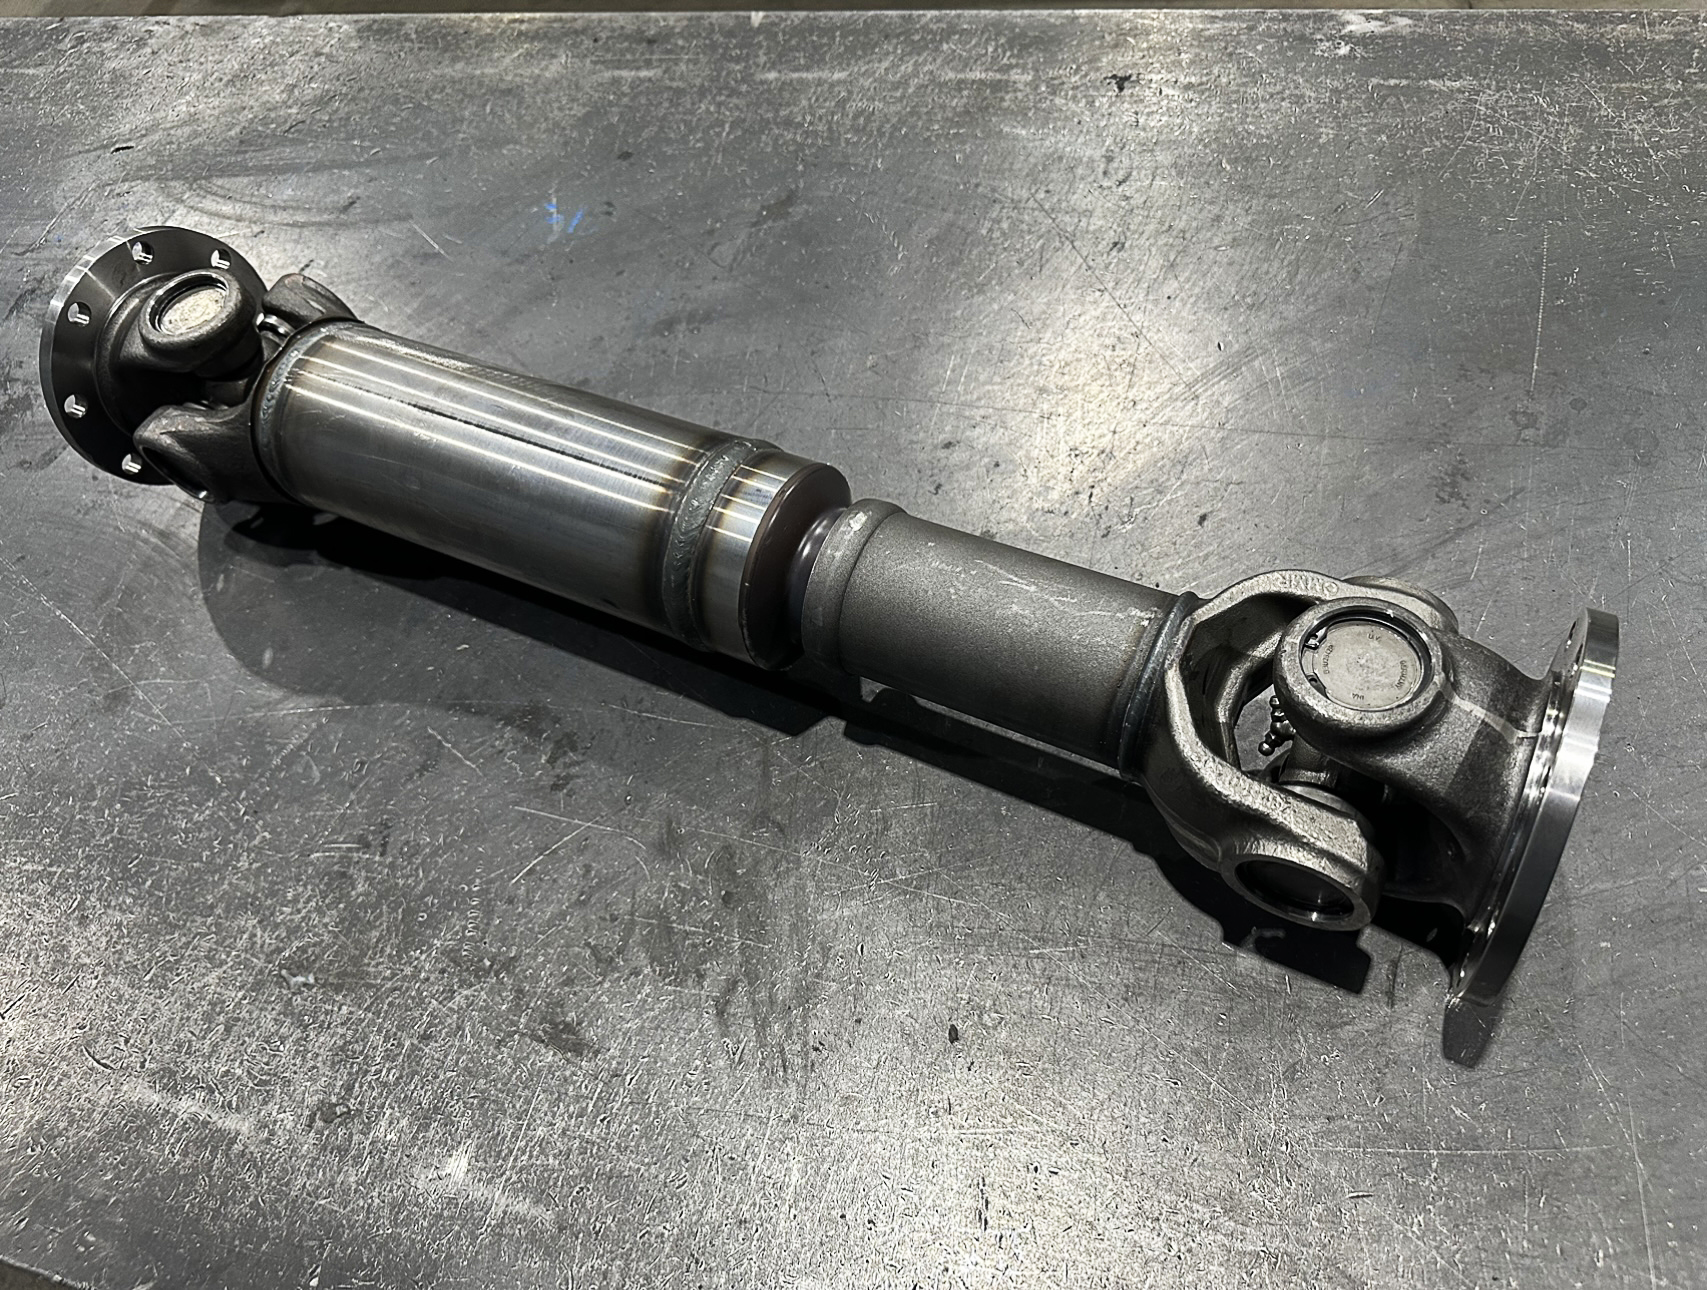
2. The brand new parts required were in stock at GJ Drivelines.
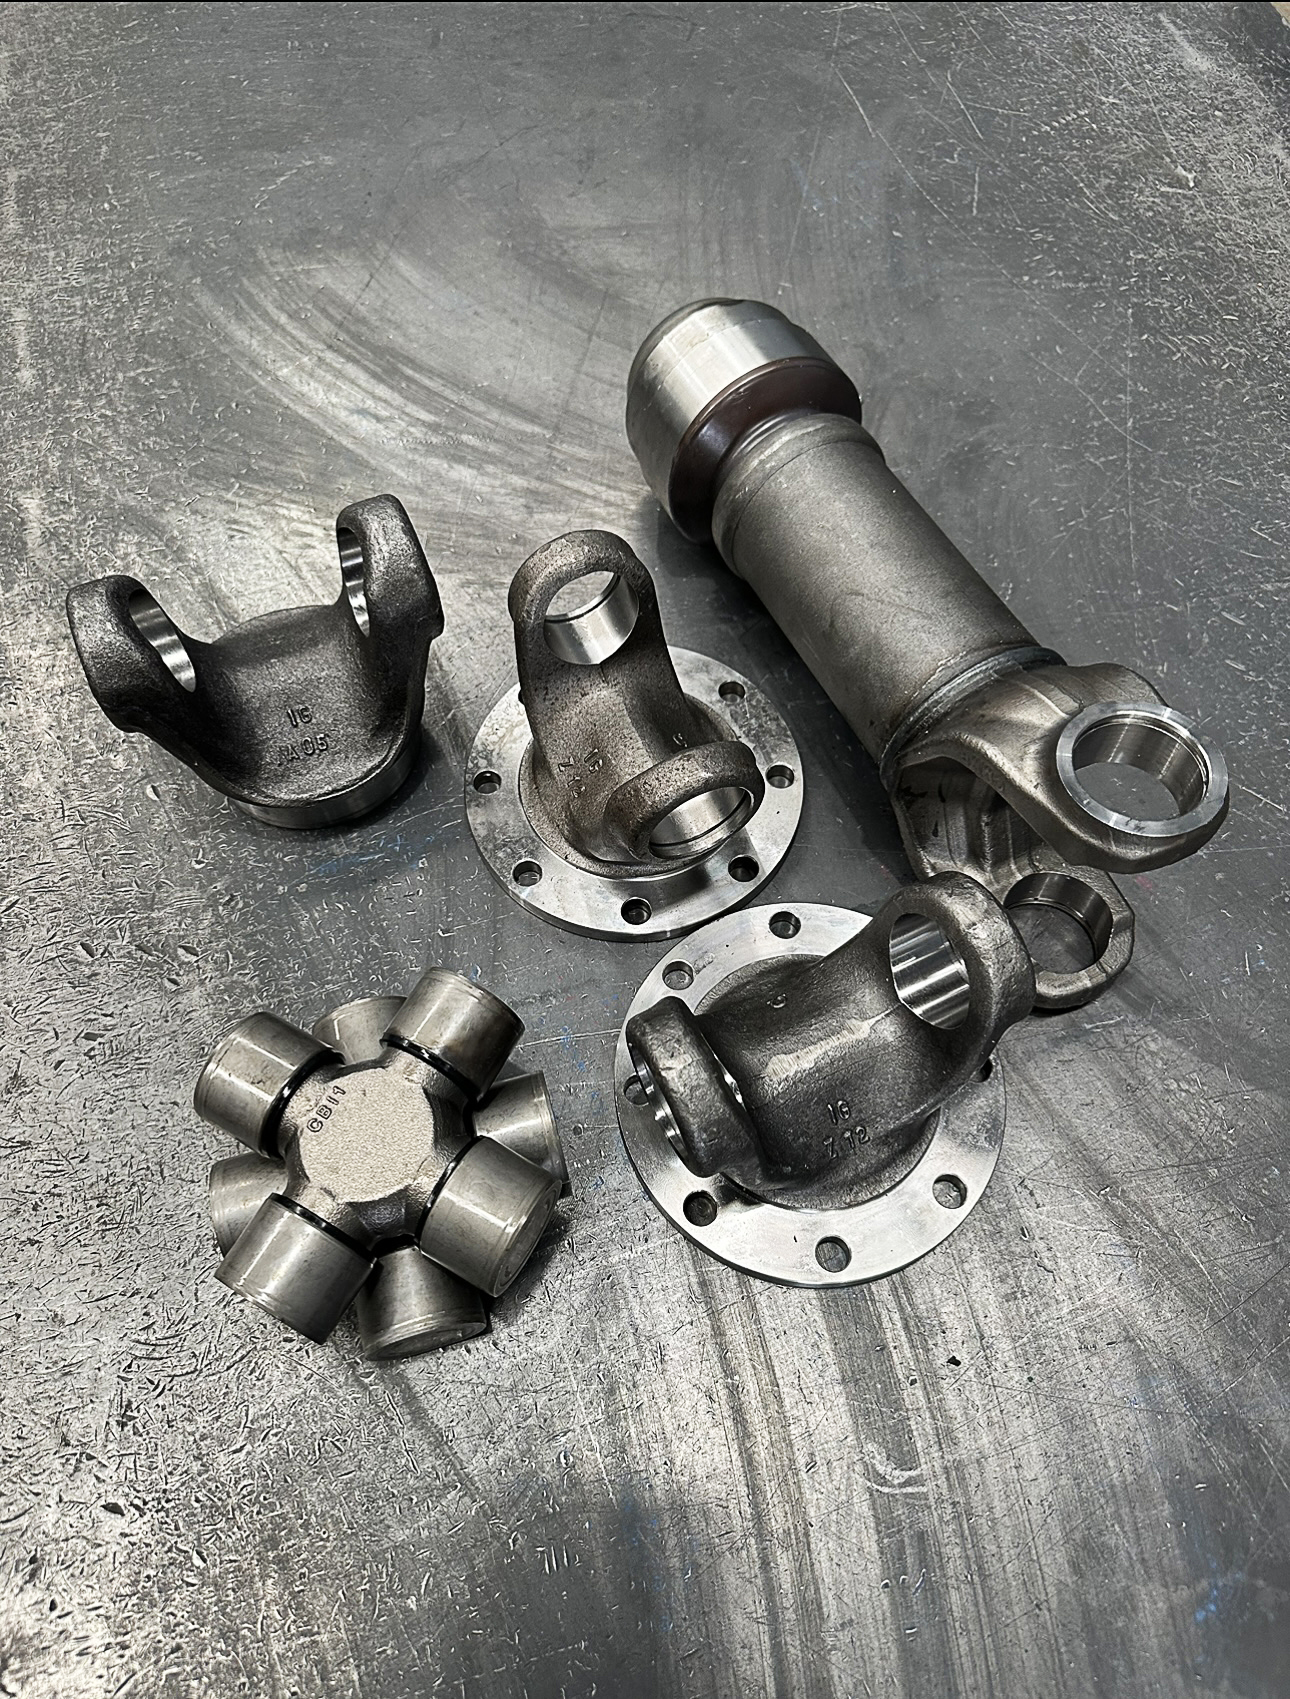
These include: two universal joints; two flanges; a weld yolk (top left) and a slip joint assembly (top right). The slip joint assembly features a larger diameter and thicker walled tube for increased strength. The spline shaft diameter is also larger, providing more splines than the factory shaft, for greater load handling. Non-serviceable universal joints last much longer than greaseable joints in most applications.
3. At this point, the slip joint is first pressed into the tube, followed by the weld yolk.
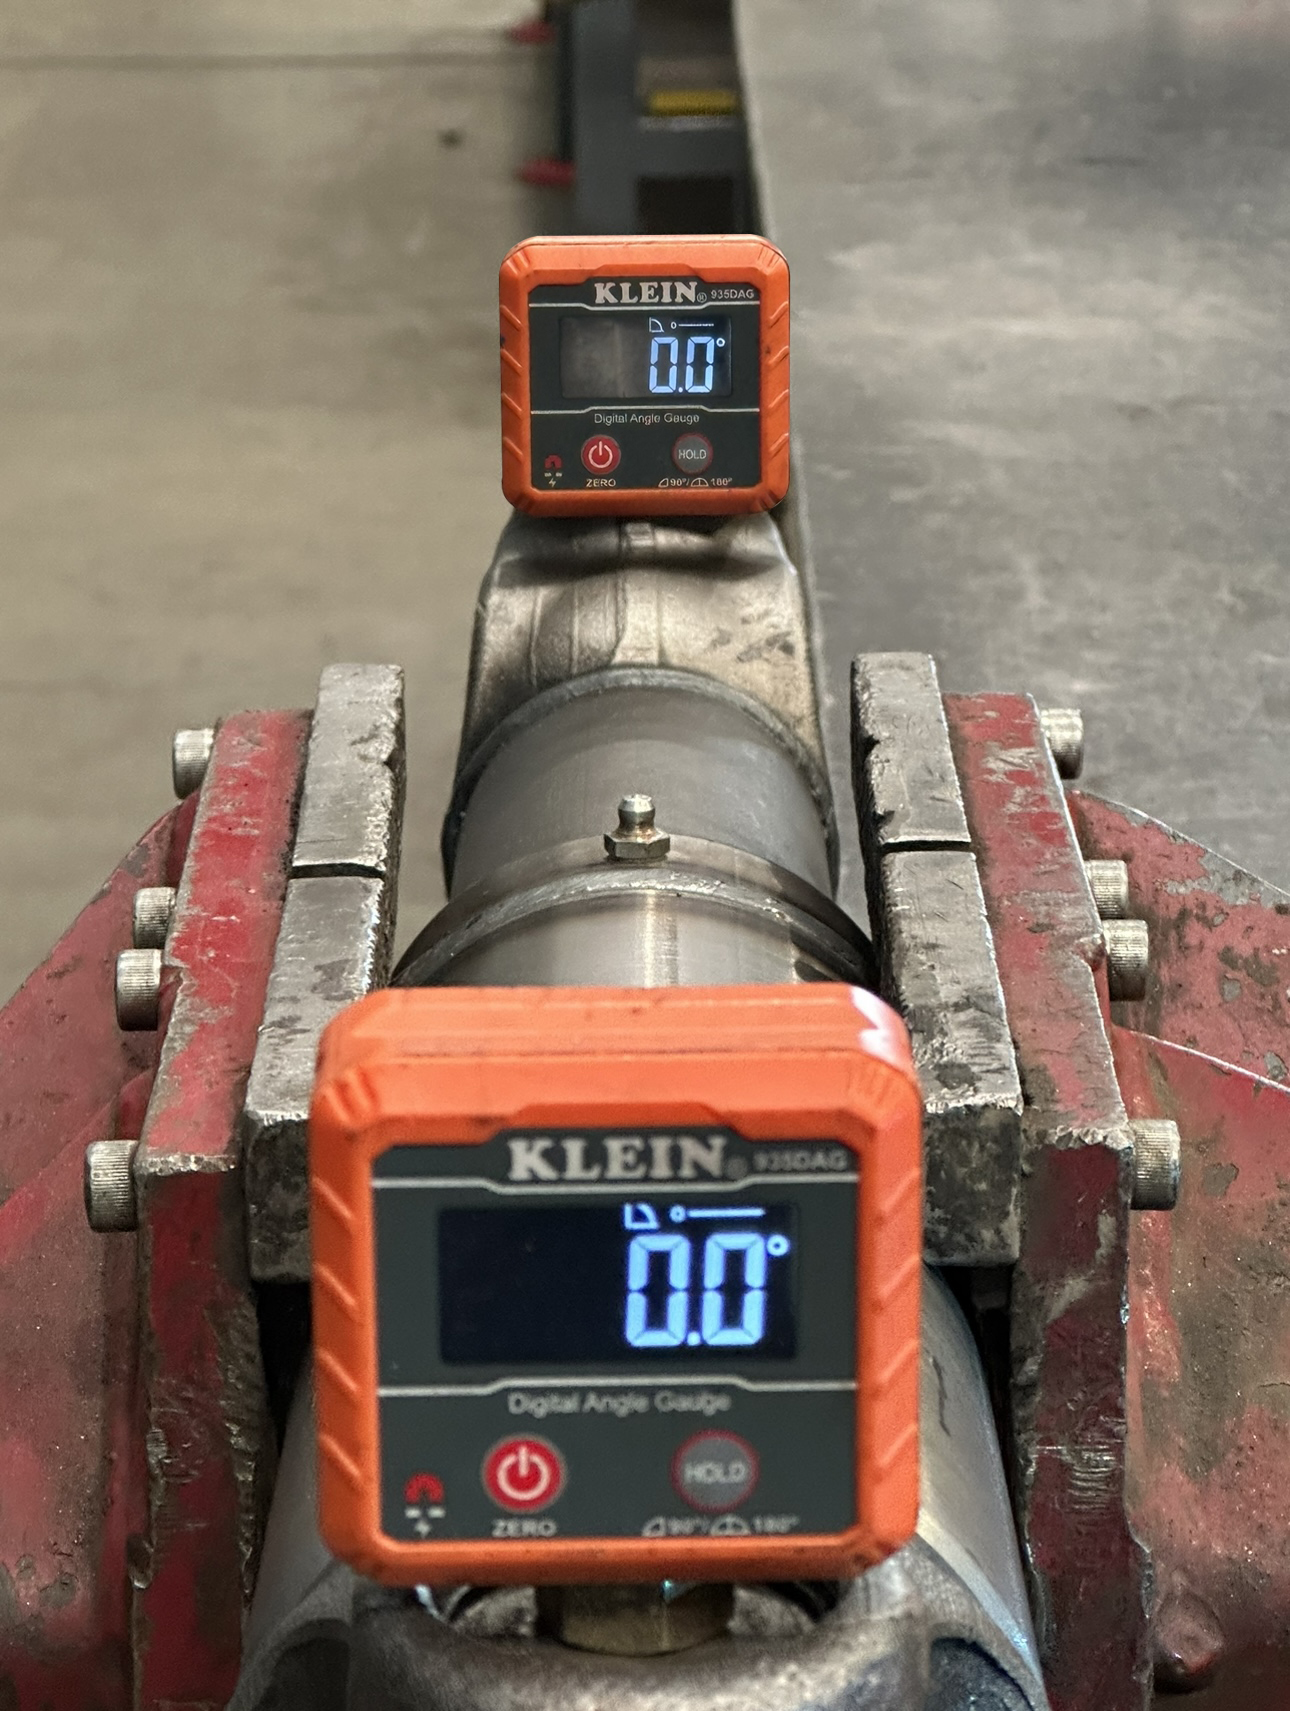
To avoid balancing issues and damaging vibration while in operation, it is critical that both universal joints are perfectly phased – hence the use of two digital angle gauges to ensure that are zeroed relative to each other.
4. The newly assembled shaft is set up in the welding fixture. Note the use of the centre in the end of the yolk.

A dial gauge is used to measure the run-out in the shaft as it is slowly rotated. This process checks the concentricity of all the components. Total permissible run-out is .002-inch. Once the run-out is within specifications, the yolks can be tacked in place, ready for final welding.
5. The shaft is mounted in a lathe to enable the yolks to be full welded in place.
6. The shaft assembly after welding. Flanges and universal joints have now been fitted and the assembly is complete.
7. GJ Drivelines use a Schenk solid bearing balancer to balance the final assembly.
Each style of shaft requires a different fixture to mount it in the balancer. Once again, a dial gauge is used to ensure the shaft is perfectly centred before balancing can commence. The tubes can be straightened by heat shrinking at this stage if necessary. Shafts such as these are balanced to ISO1600, which requires testing balance at 1600rpm and achieving a balance of less than 5g at each end. Weights are welded to the shaft if required to reach these tolerances.
8. The finished driveshaft. The brand new shaft has had the balanced weights tacked in place, received a new coat of paint and the all-important GJ Drivelines sticker.

This shaft was turned around in a single day, making for one very happy customer.
Source:
GJ Drivelines – Somerton
(03) 9305 7261
GJ Drivelines – Keysborough
(03) 9706 3166